Project Development
Project Development Blog Entry
- Briefly describe my team
chemical device
- Show how the team
planned, allocated the tasks, and executed the project.
- Document the entire
design and build process of the chemical device and include videos,
pictures, and screen captures of the processes.
- Include “Hero shot” of
every milestone of the processes, example the part A that was 3D printed,
part B that was laser-cut, electronics components moved/worked according
to the program. Hero-shot is taken with the person-in-charge
holding/working/making the parts.
- Include the name of the
person who was in-charge of every part of the project.
- Document my individual
contribution to this project.
- Provide the link to the
page of the blog of my teammates.
- Describe problems
encountered and how the team solved them.
- Include all the project
design files as downloadable files.
- Embed the final
prototype design file, i.e., the final fusion360 design file showing the
entire prototype.
- Type my Learning reflection on the overall project development.
1.
Our team
Chemical Device
●
In this
section, I will briefly describe my team chemical device.
●
What it is.
What problems will the chemical device solve?
● Below is the hand sketch of the chemical device.
My team’s chemical device is the Tea
Maker.
Background
Tea is a very common
beverage that can be found anywhere in the world. It is the 2nd most popular
drink in the world behind water. Almost 3 Billions cups of tea are drunk every day worldwide. The revenue for tea
globally is about US$214,761m in 2019. We can see that tea plays an important part in the daily
lives of people all over the world. Drinking tea also has its benefits.
Different types of teas provide different benefits due to its content.
Benefits
White Tea- Helps in fighting and
protecting against several form of cancers
Green Tea- Reduce risk of cognitive
diseases and lower cholesterol levels
Black Tea- Supports the immune system
Oolong Tea- Reduce Stress & Anxiety
Brewing tea is a complicated art form.
To brew the perfect cup of tea, several factors have to be taken into
consideration such as temperature, concentration and brewing time. For example,
black tea requires a temperature of 208℉ while green tea requires a temperature
of 175℉. Our tea maker will be able to solve this issue.
References:
Chee, C. (2022). Tea-riffic Tea Statistics For 2021 and 2022.
[online] Truly Experiences Blog. Available at: https://trulyexperiences.com/blog/tea-statistics/#:~:text=Every%20day%2C%20three%20billion%20cups
[Accessed 18 February 2023]
Edgar, J. (2009). Types of Teas and Their Health Benefits.
[online] WebMD. Available at: https://www.webmd.com/diet/features/tea-types-and-their-health-benefits
[Accessed 18 February 2023]
Tea Forte. (2021).
How to Steep the Perfect Cup of Tea. [online] Available at: https://teaforte.com/blogs/tea-notes/how-to-steep-the-perfect-cup-of-tea
[Accessed 18 Feb. 2023].
Vu, B. (2019). Tea Statistics | Consumption & 2021 Industry Data. [online] Your Best Digs. Available at: https://www.yourbestdigs.com/tea-consumption-industry-statistics/ [Accessed 18 February 2023]
Project
Objective: To achieve an ideal cup of tea in a convenient manner, by using a tea brewer machine for the user to enjoy.
It is required that the process is safe and the machine is compact while easy to use. Overall ensuring user-friendliness and better quality of life for users.
Description of our chemical device: The tea maker is based on brewing black tea. The user will first place the tea bag onto the hook. Next, place a cup of hot water onto our tea maker and put the temperature probe into the cup. The temperature sensor will then measure the temperature of the water. If the water is at the desired temperature, the tea maker will begin to rotate, lowering the lever with the teabag and submerged the teabag in the water for a set duration for brewing. (3 minutes) After the time is up, it will play a tune to alert the user and lift the lever back up.
How our tea maker can solve the problem:
In order to make the perfect cup of tea and receive the benefits, the person would have to measure the temperature personally and use a stopwatch to time. With our tea maker, we can make it automatic and do it for the user, providing convenience. The user can use this time to work on other things. This Tea Maker can be used at home to make yourself the perfect cup of tea to enjoy.
Sketch of the tea maker

2.
Team Planning,
allocation, and execution
●
In this
section, I will list down my team member's name and their respective roles
(CEO, CFO, COO, CSO)
●
I will show
the finalized BOM (BILL OF
MATERIALS) table.
● I will show the finalized Gantt chart (planned and actual) and the tasks allocation for each team member.
Team Members’ Roles
Chief Executive Officer (CEO): Kieron
Chief Financial Officer
(CFO): Ruba
Chief Operating Officer
(COO): Cheryl
Chief Safety Officer (CSO): Hong Yi
Finalised BOM

Finalised Gantt Chart
.xlsx%20-%20Sheet1.jpg)
Task Allocation

●
Kieron and Ruba will be working
on Arduino programming with each of them taking one section.
●
Cheryl will be in charge of
laser cutting.
● I’ll be working on the CAD and 3D printing the parts.
3. Design and Build Process
In this section, I will provide documentation of the design and
build process.
Cardboard Prototype

Part 1. Design and Build of Tea Maker - CAD & 3D Print
(done by Me).
My task was to create the CAD
for our Tea Maker and 3D print the
required parts, lever and hook.
CAD
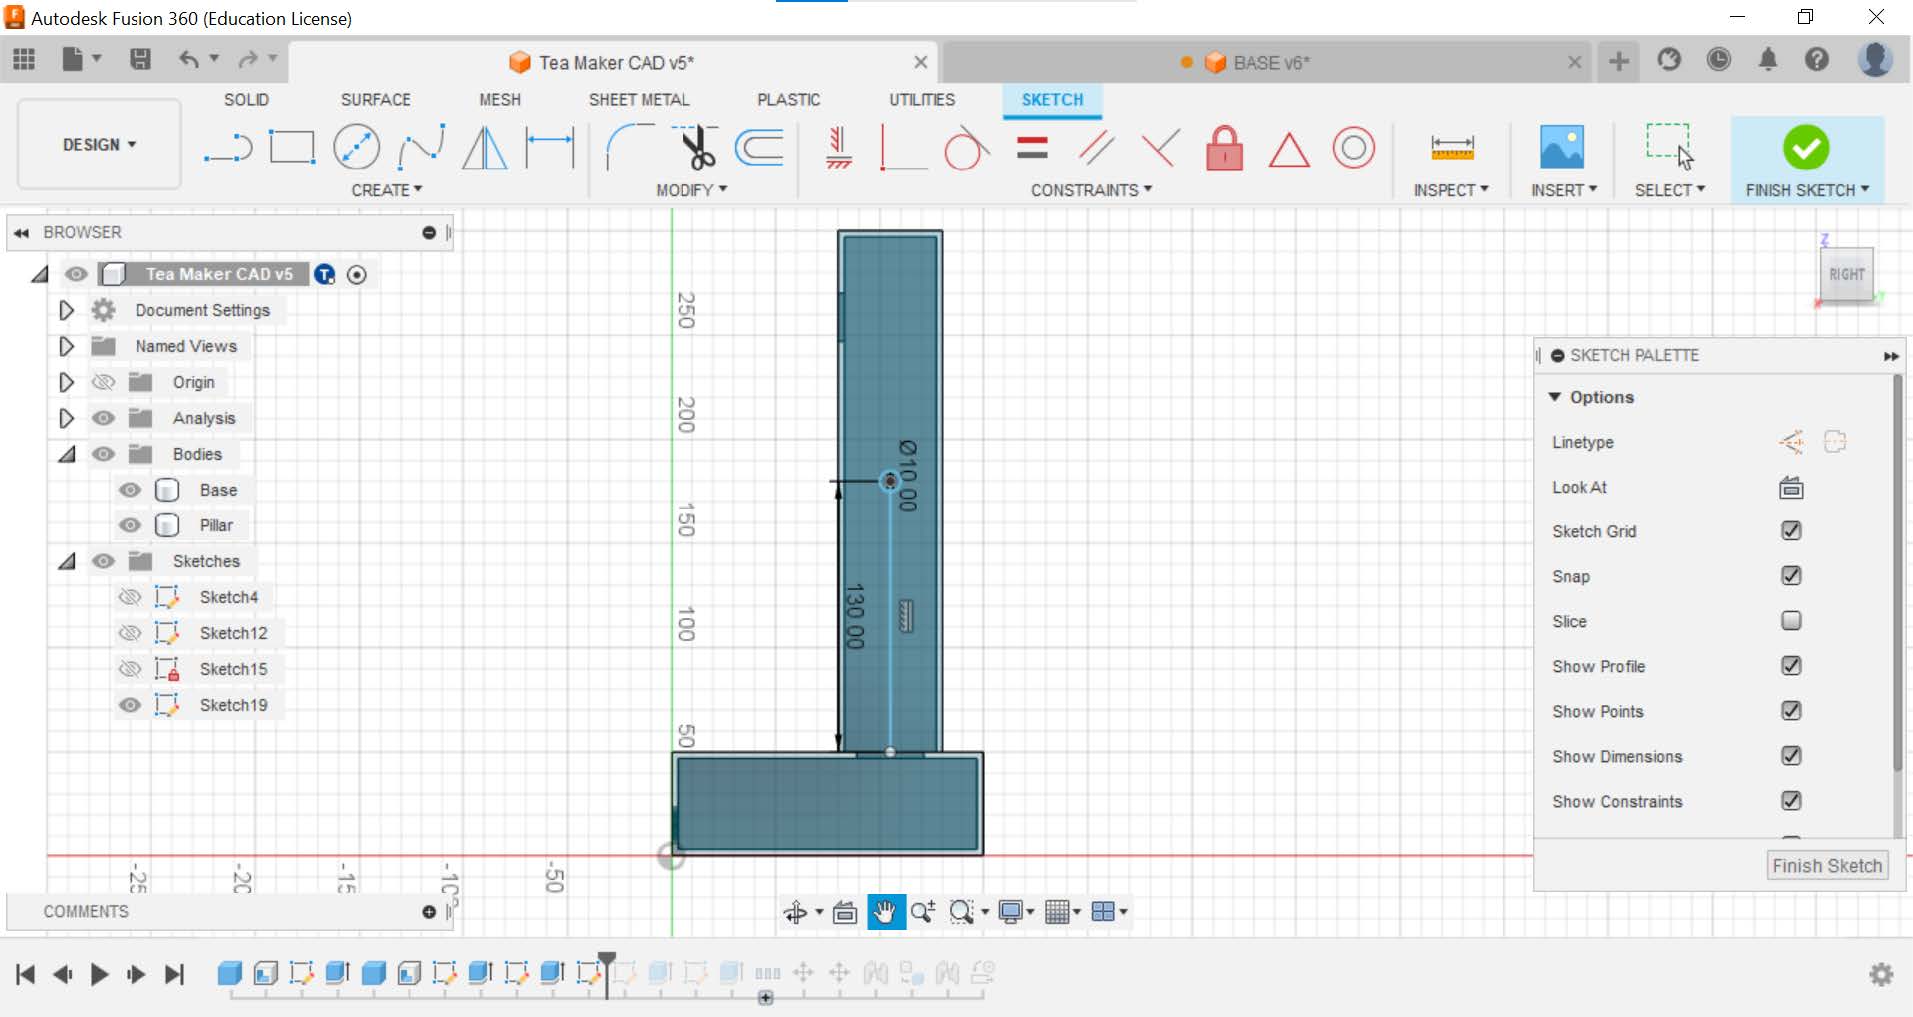
Tea Maker Body Design
- Before starting, I specified these parameters so that the design
can be easily modified later if the dimensions were to be changed.

- To create the base, I used the box function under Create and used
the dimensions specified in the parameters.

- The base has to be hollow so I used the shell function on the body.
I select the whole body as I want the inside to be hollow while keeping
all the sides solid.

- To create the hole for the sound to come out of and USB Micro B
cable to go through, I created a rectangular and circular shape and
extrude it to cut.


- Now to create the pillar, I repeated what I did to create the base
using the box feature.

- The pillar has to be hollow from the bottom, not just the middle so
I used the shell function on the bottom face of the pillar.

- For the hole to fit the motor, I created a rectangle of 23mm by
13mm which is at a distance of 30mm from the top of the pillar.


- The next thing to do is create a hole between the pillar and the
base for the wire to connect to the motor above.


- A hole is created at the side of the pillar for the temperature
probe to go through. 130mm from the base to the center of the circle of
10mm diameter.


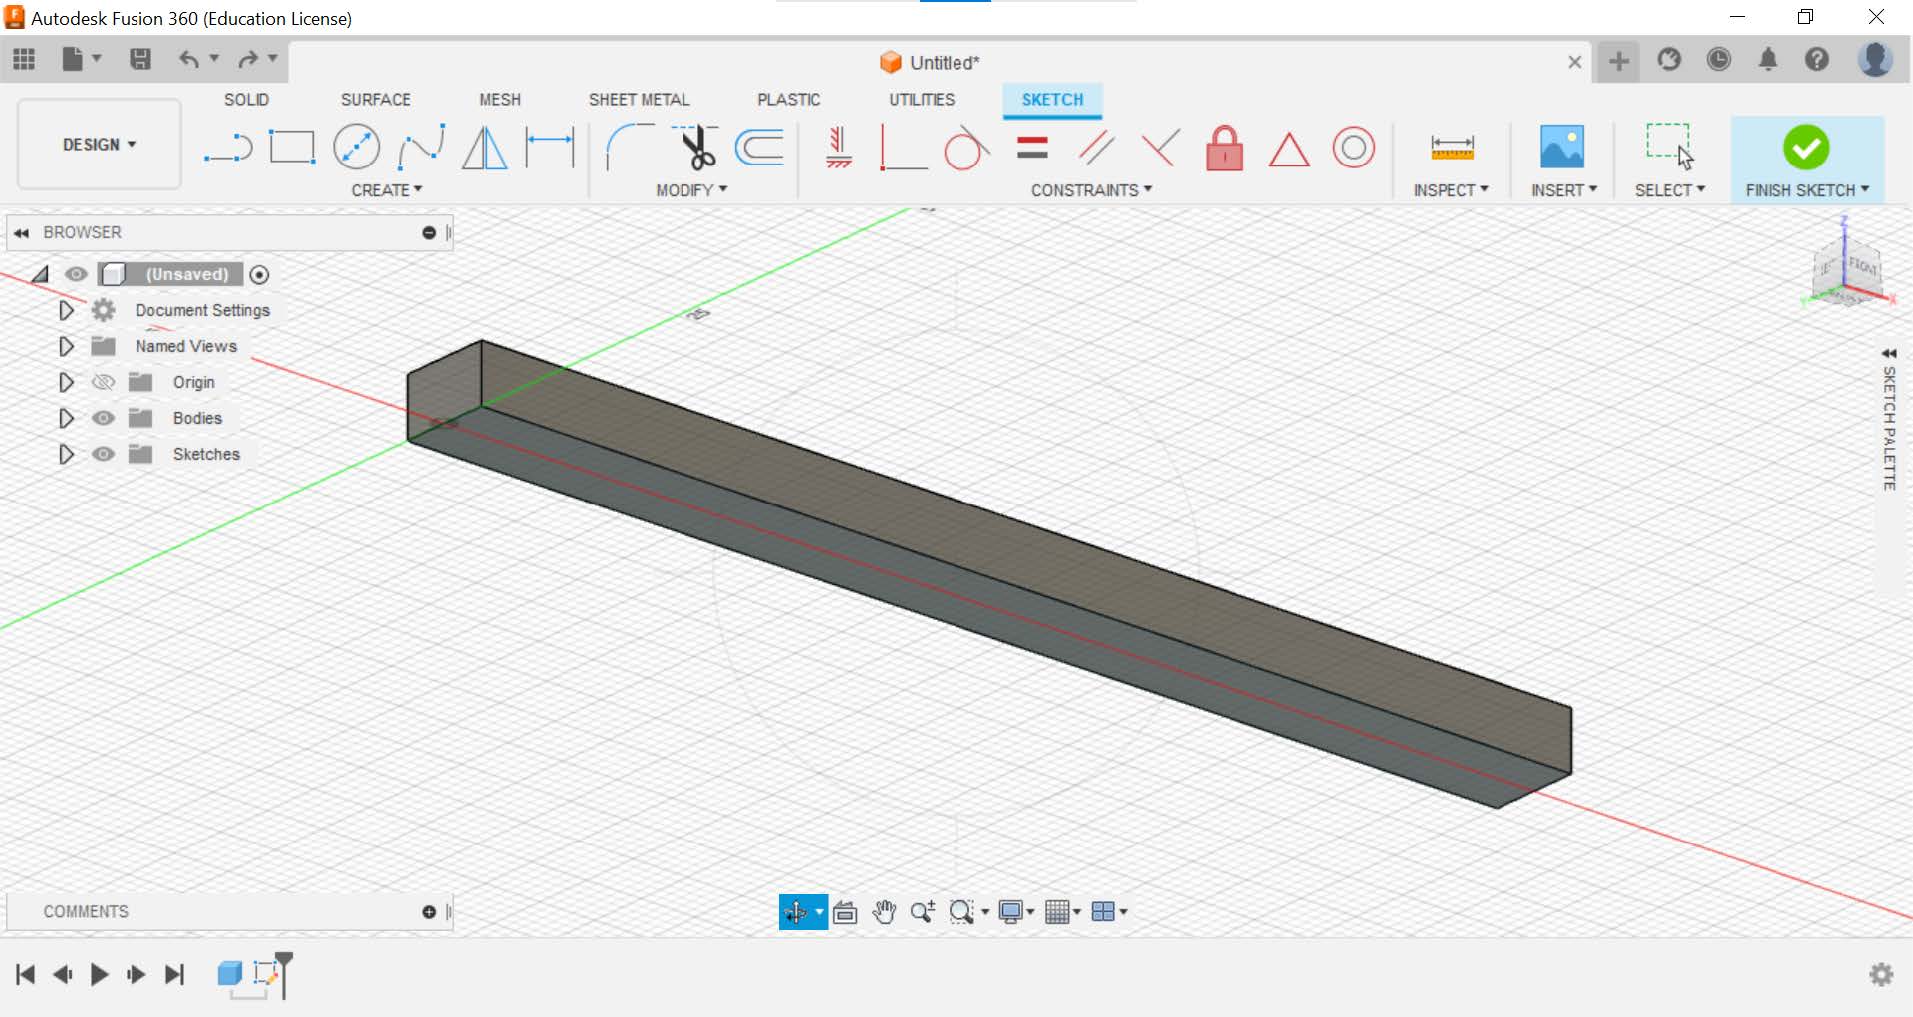
Mechanism Design (Lever)
- Using the box
feature, I created a cuboid 100 mm ✖ 8 mm ✖ 5 mm.

- I created a sketch on the bottom face of the cuboid to cut a hole
to fit it onto the servo.


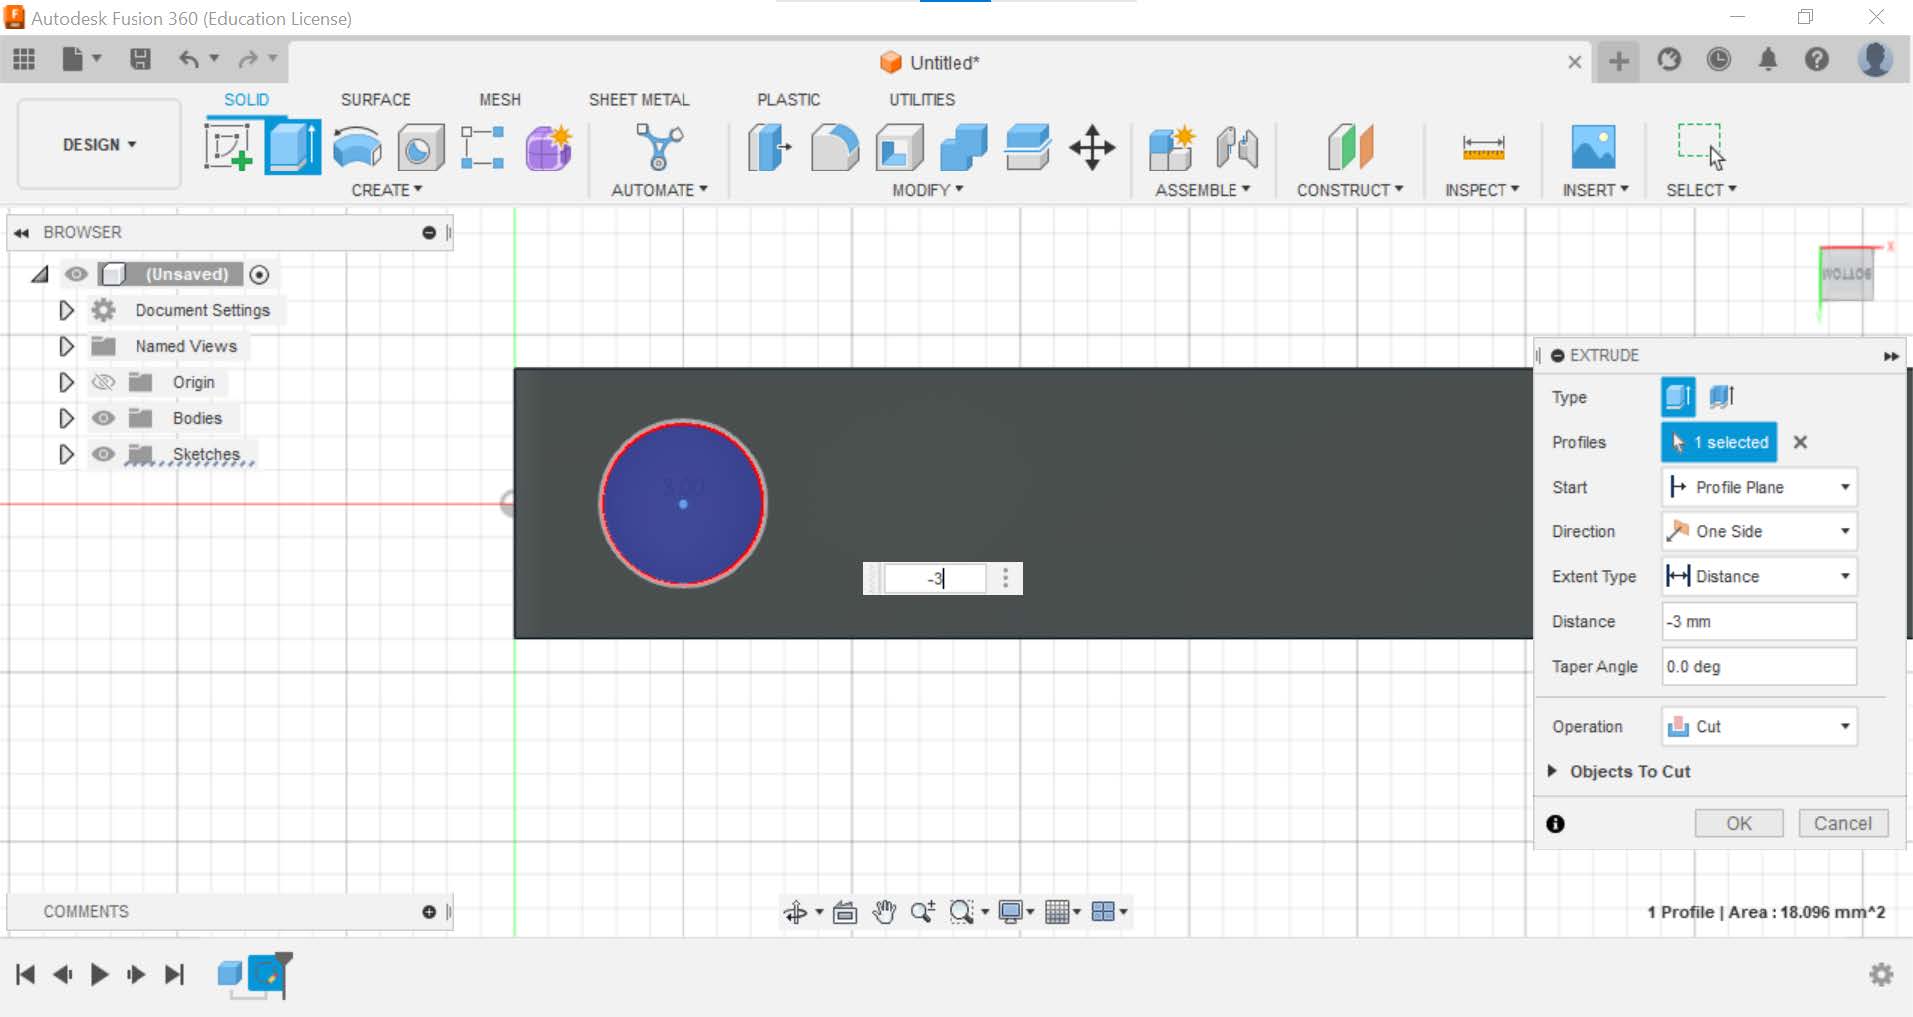
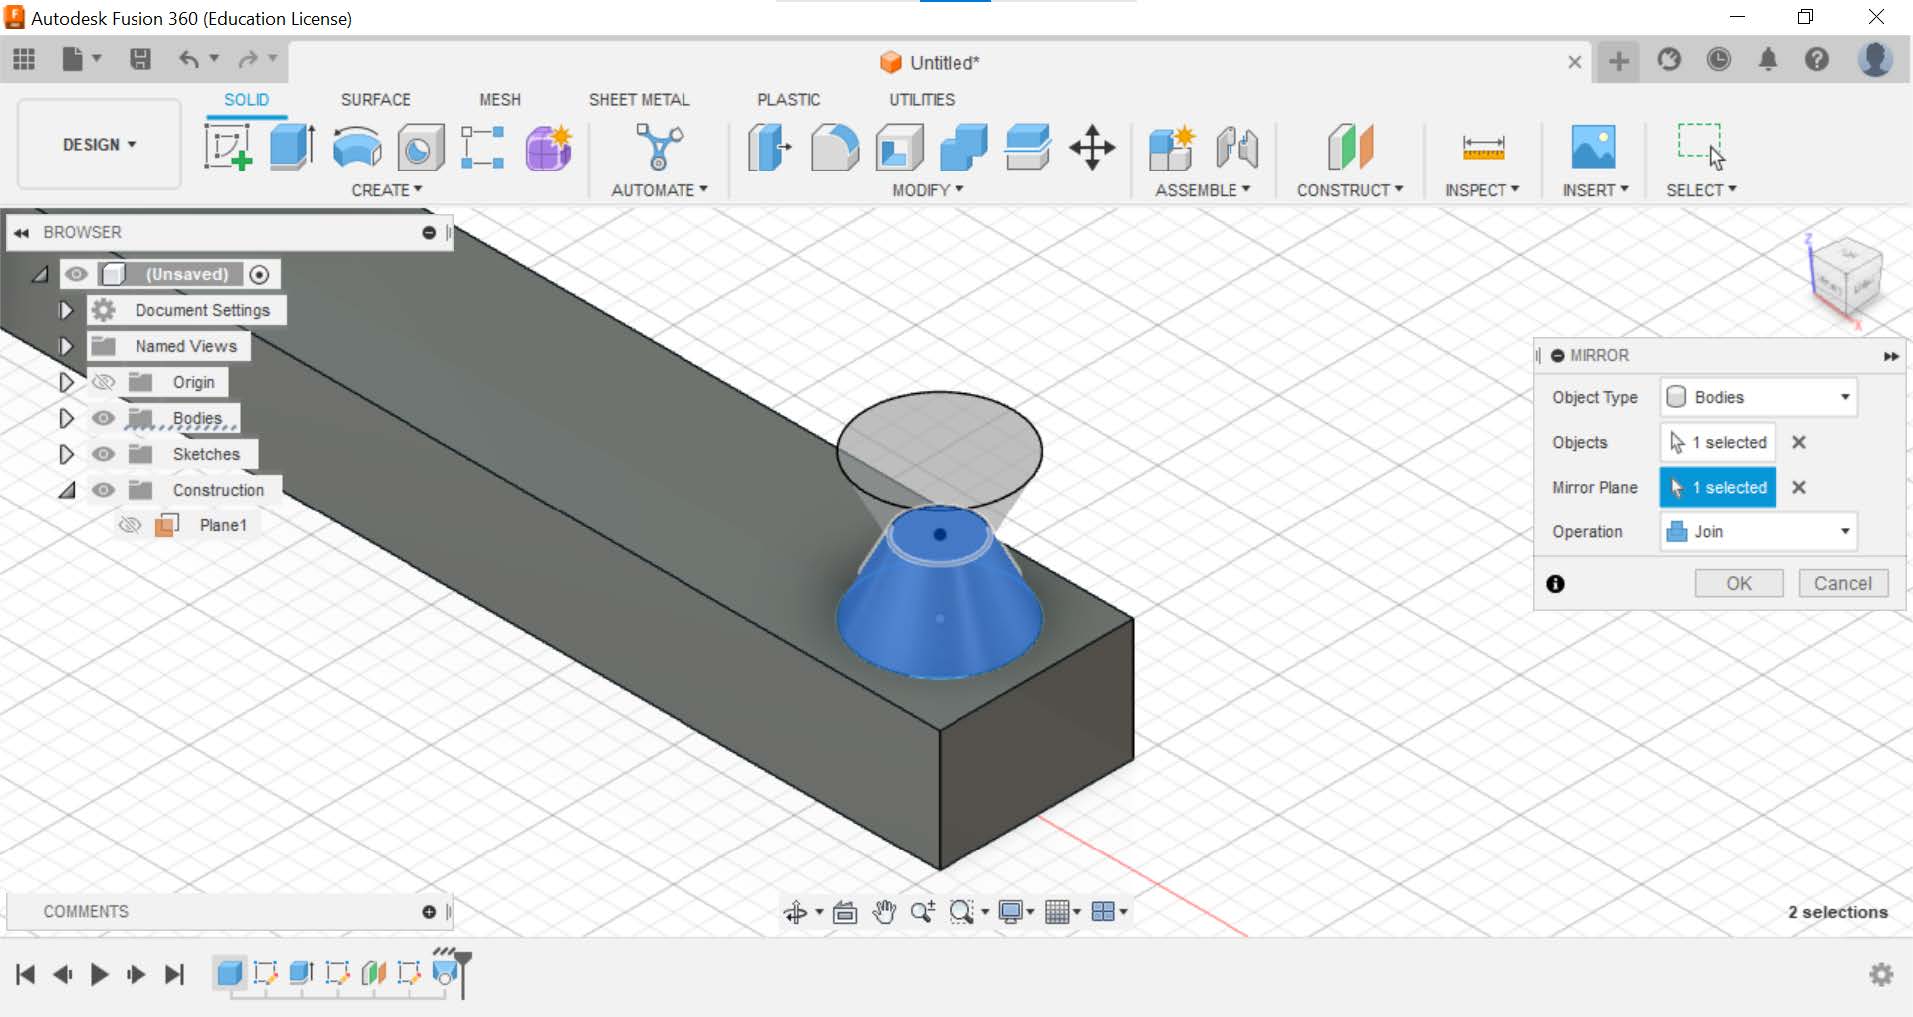
- Next is to create a converging and diverging shape similar to a
venturi tube for the hook to be placed in using the loft function under
create.


- I created a smaller hole on top of the gap where the lever will be
attached to the servo so that we can use a screw to secure it onto the
servo.


- After the lever is created, the hook is next.


This is how it looks after minor touch ups and putting everything together.

3D
Printing
The parts that we will be 3D
printing are the lever and the hook.
- First, export it to an stl file.

- Next, open up the stl file. I used the Ultimaker S3 to print the
parts. These were the settings changed, the rest is default. After
changing the settings, I sliced it and save it to the thumb drive for
printing.


- 3D print it. The photo and video is based on the first time I 3D
printed. However, it is very similar to the latest version.

Hero Shot

Part 2. Design and Build of Tea Maker - Laser Cutting (done
by Cheryl)
Link to Cheryl’s Blog: https://cp5070-2022-2b04-group3-cheryl-neo.blogspot.com/
Part 3. Programming of Temperature Sensor (done by Kieron).
Link to Kieron’s Blog:https://cp5070-2022-2b04-kieron.blogspot.com/
Part 4. Programming of Servo and Melody (done by Ruba).
Link to Ruba’s Blog:https://rubasulaiman156.wixsite.com/cp5070-2022-2b04-gro
Part 5. Integration of all parts and electronics (done by
All)
After creating the individual parts, it is time for us to put it all
together. For acrylic glueing, we made use of a set square to ensure that the
sides are perpendicular to each other and masking tape to tape the sides
together to hold it in place.
We glued the 4 sides of the base first without the cover so that we
can put in the electronics later on.


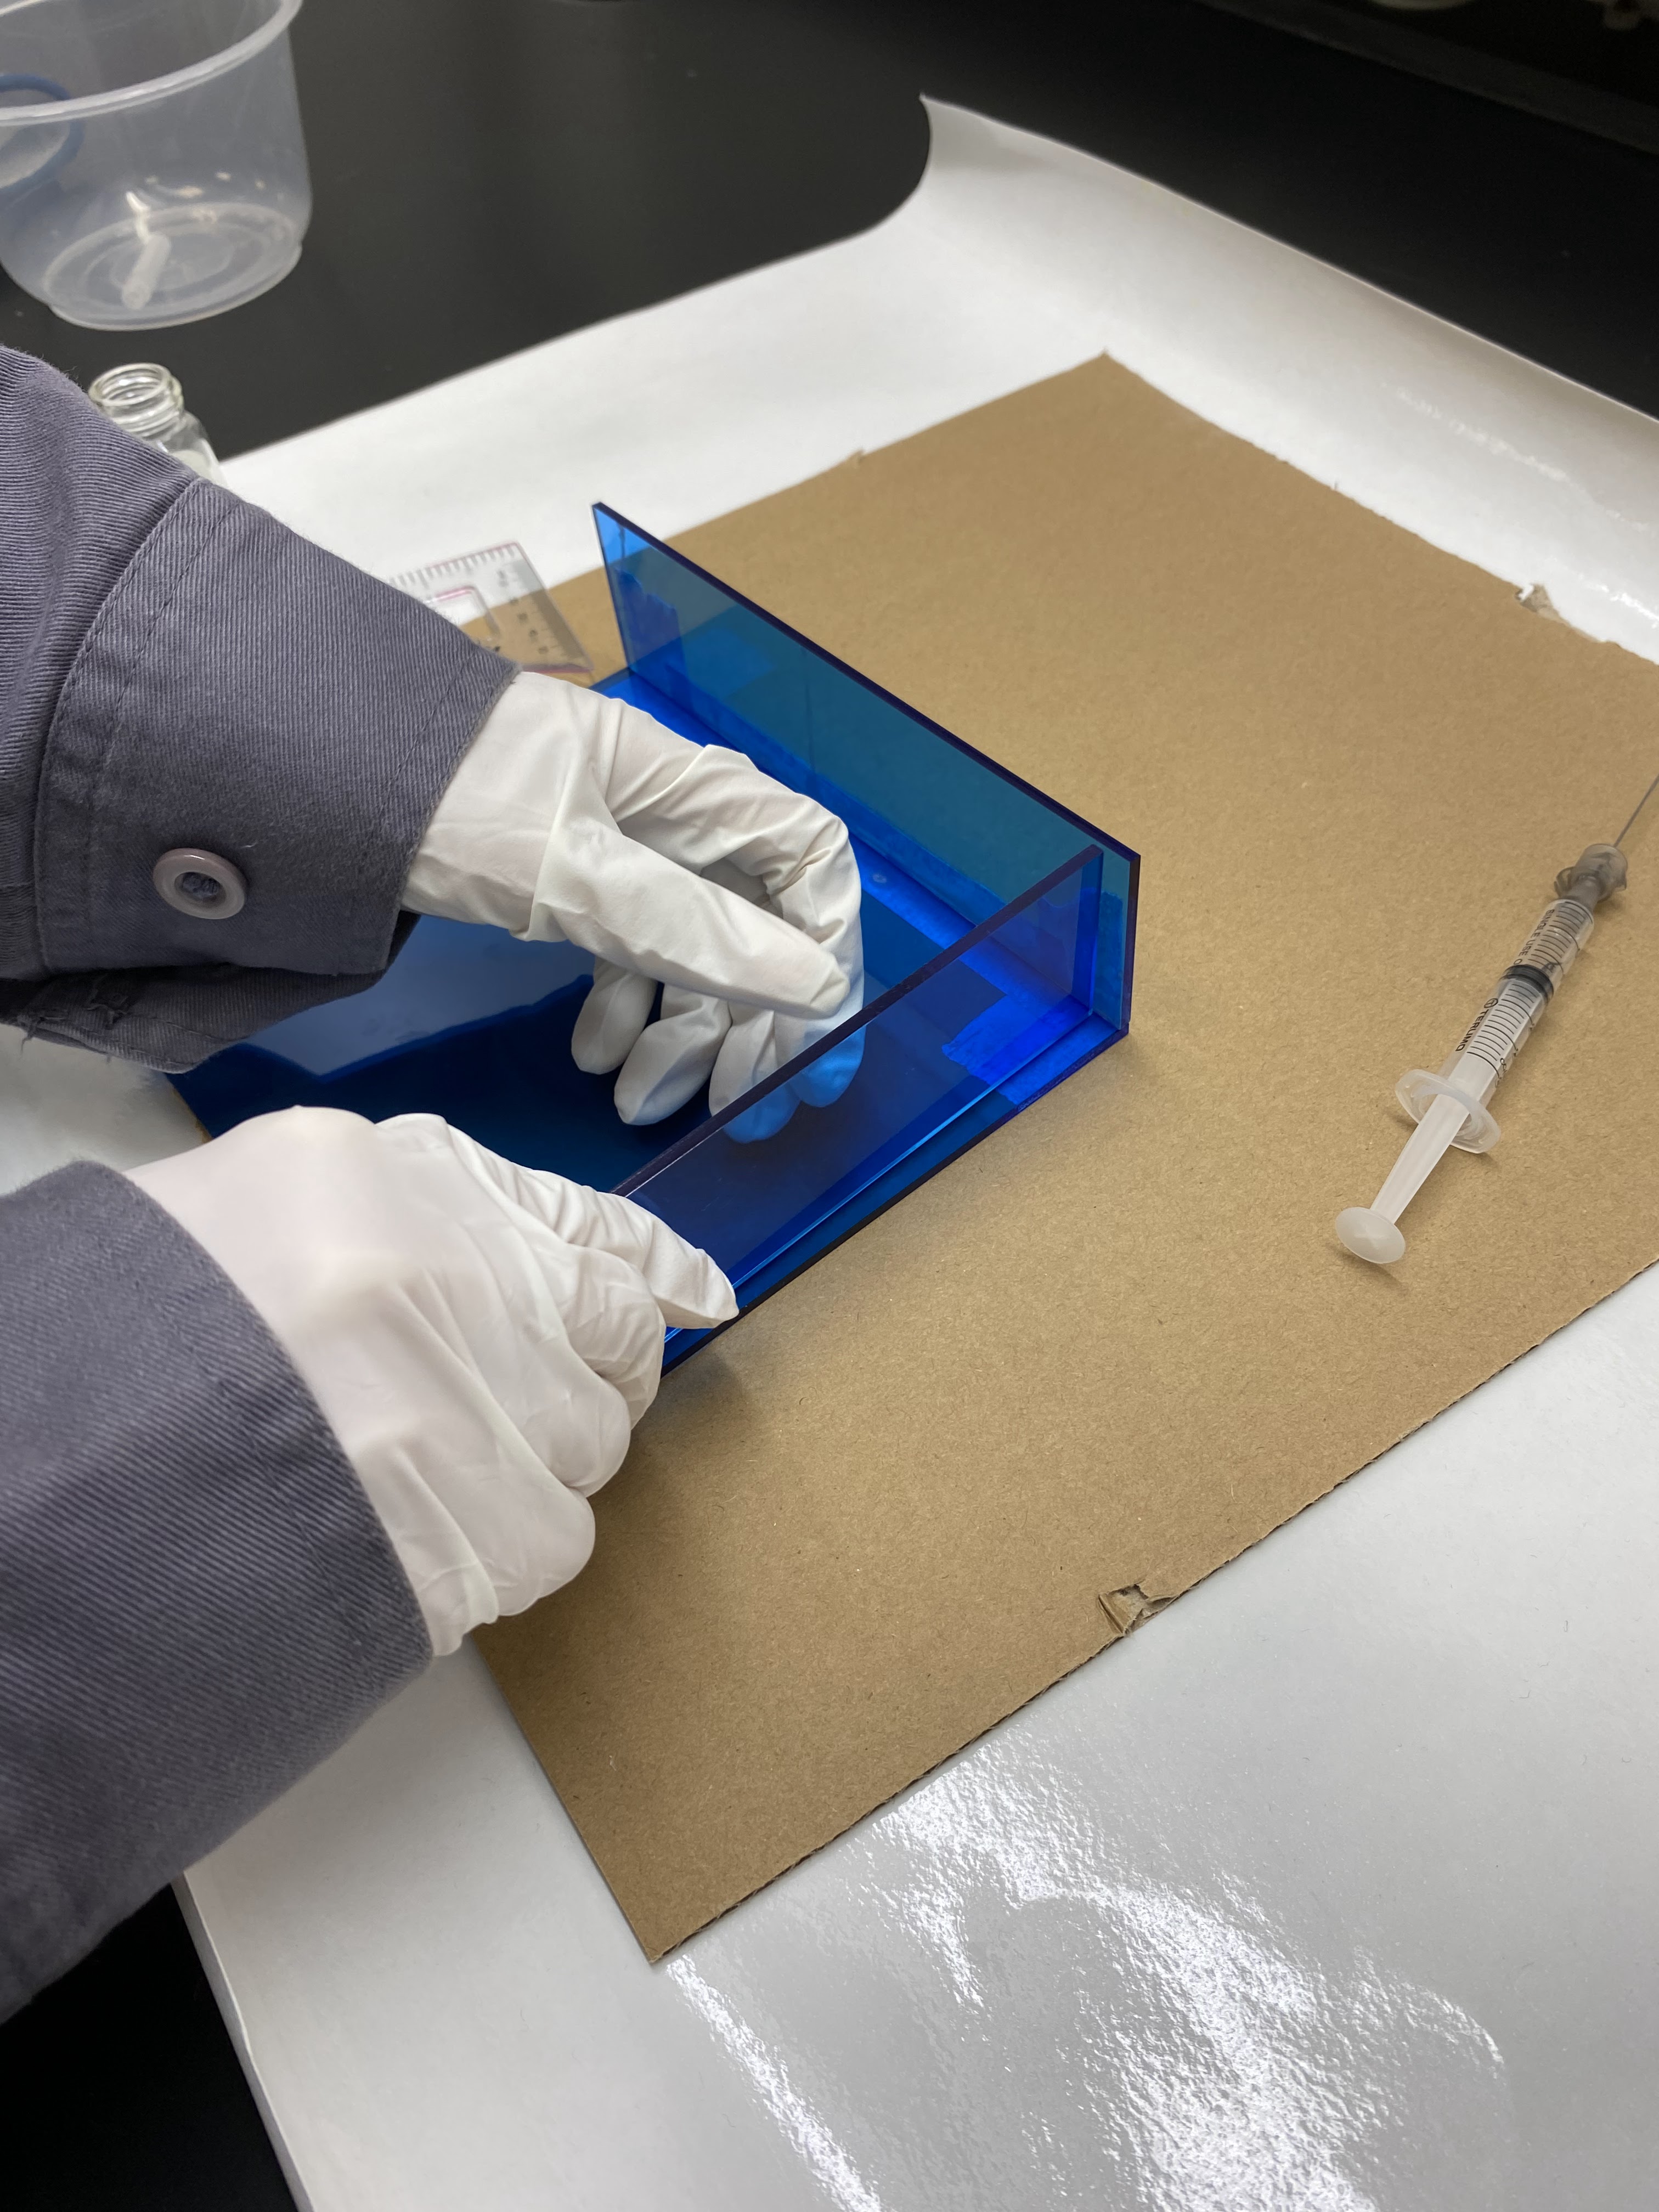

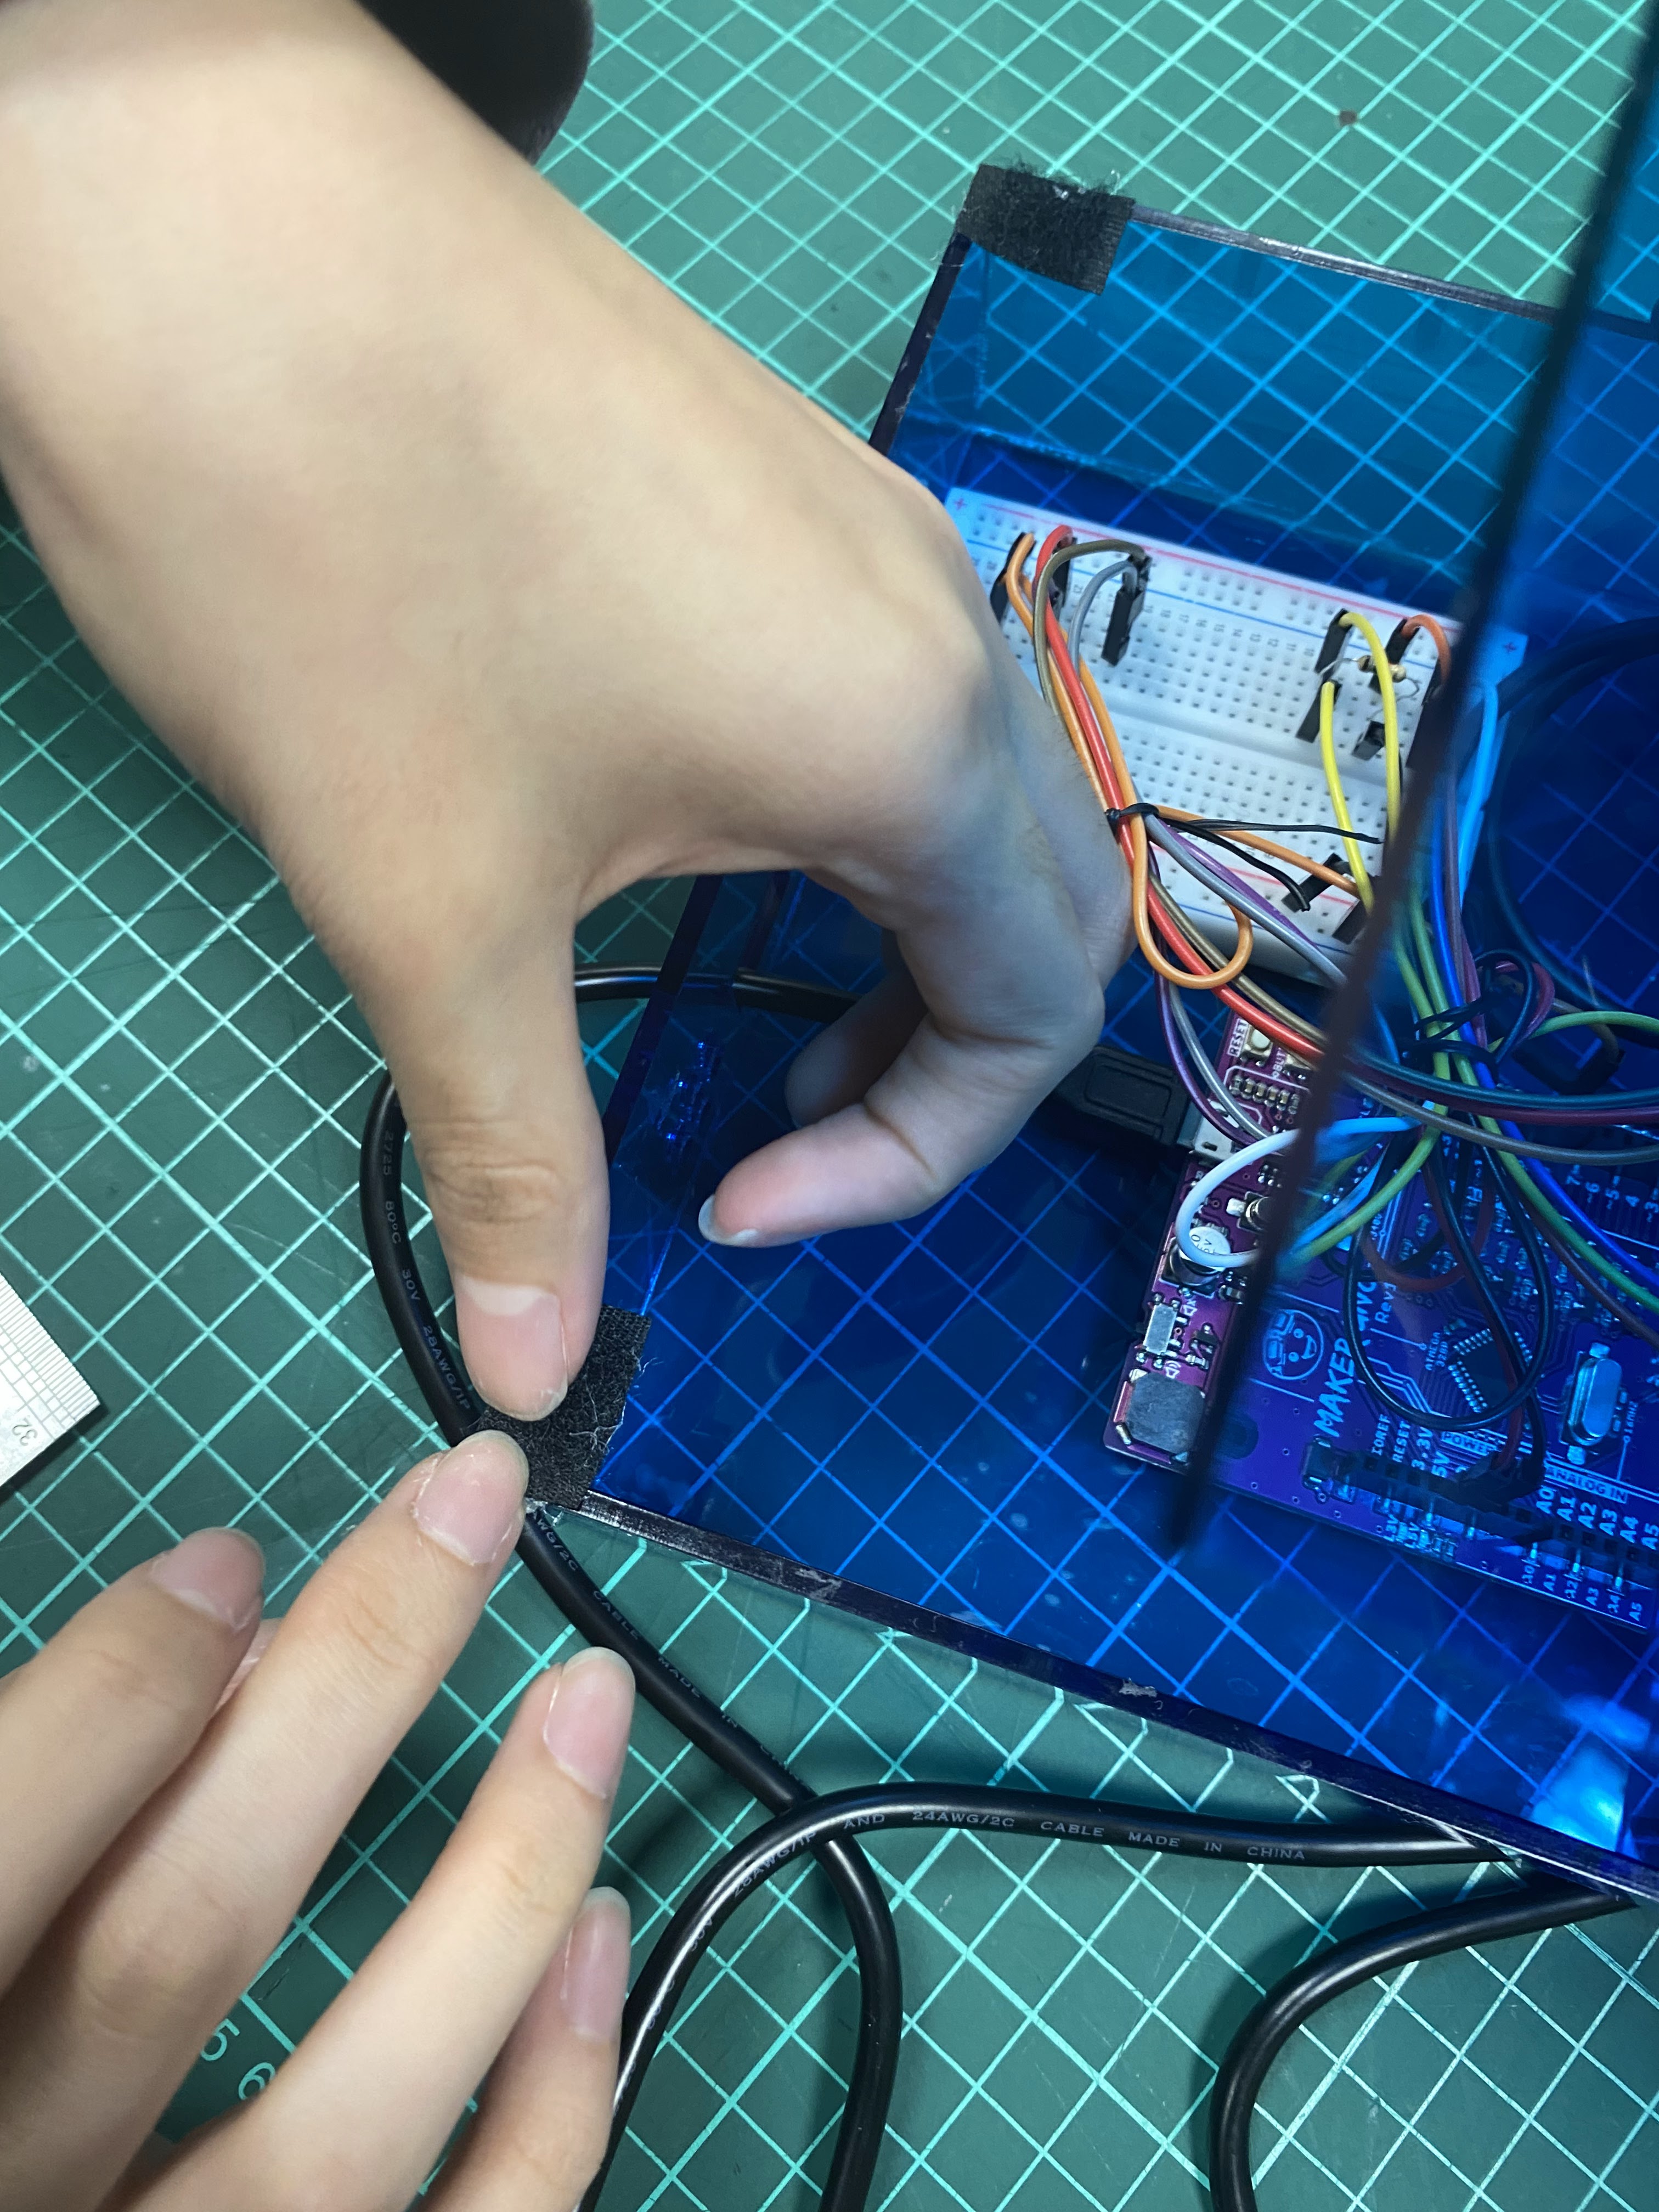
After that, we glued the sides for the pillar. We attached the temperature sensor to the pillar first before glueing as it will be challenging for us to put the probe through the hole once we glued all the sides.


After the base and pillar has been assembled, we arranged and placed the Arduino and breadboard inside the base. For our prototype to prevent the base from being closed off completely, we decided to use Velcro to attach the cover of the base.


Demonstration of our tea maker
Hero Shot

4. Problems and solutions
In this section I will describe the problems encountered in the design and build process and how the team solved them.
1st Problem: Lever
→ The lever cannot be attached to the servo tightly. The diameter of
the hole of the lever was too big. Initially, the lever could fit onto the
servo nicely. However, after continuous usage, the lever became loose and was
unable to lift the tea bag.
Solution- Decrease the diameter of the hole to 4.8mm and add a
smaller hole of XX mm on the lever. Change the servo to a metal gear servo that
has screw thread.
The smaller hole is to allow the screw to go through and secure the
lever to the servo.
2nd Problem: Integration
of the 2 different sets of code.
→ The temperature sensor and servo could not work after putting it
together.
Solution- We consulted Dr Noel and came up with the sequence of
events for the programming. This allowed us to tackle it one by one and make
the necessary adjustments to make it work.
3rd Problem: Servo was
moving too fast at certain points
→ The servo jolted up immediately after 3 minutes of brewing. This
would cause the tea to splash, causing the surroundings to be wet and dirty.
This was due to improper placement of brackets which results in the code that
makes the servo lift up slowly not to be under the if statement.
Solution- Add brackets at the appropriate places
4th Problem: Continuous
cycle of the entire process
→ The whole process repeats when the temperature sensor measures the
temperature to still be within the set range.
Solution- Adding a string of codes that makes the code loop once only.

5. Project Design Files as downloadable files
In this section,
I will provide all the design files (Fusion360 files, .dxf files, .stl files,
arduino programs files) as downloadable files.
CAD & 3D Printing
Laser Cutting
Arduino Programming
6.
Below is my
Learning Reflection on the overall Project Development.
We have finally reached the end of this project. This
project has been a very long and exhausting journey but I have gained
experiences and learnt valuable lessons. Documentation was very helpful for us
during this prototyping journey. We were able to make use of it to guide us.
For example, laser cutting. I was also able to make use and apply what I have
learnt from ICPD. From ICPD, I learnt about cardboard joineries and created the
cardboard prototype for our tea maker. The cardboard prototype was very useful
as it allowed us to test our code and I was able to test the 3D printed lever
and identify problems early. For example, I used the cardboard prototype to
check if the lever was long enough and together with the servo, check if there
are any issues when the tea bag is lowered, which there was. The lever became
loose after a few uses and was unable to lift the teabag back up. Hence, I was
able to make adjustments to the lever early and have it ready when the team
maker is fully assembled using acrylic.
I have also improved my skills in terms of laser cutting.
Laser cutting was a good learning opportunity as unexpected things happened and
was not covered in the previous laser cutting lesson. For example, the laser
cutting file that we prepared was using fusion360 so there were different
perspectives and we had to choose which to project in order to import into
CorelDraw. This caught us off guard and when we tried importing, we just saw a
straight line that looked nothing like what we had designed. Hence, we decided
to ask the FabLab staff for help and he resolved this issue. The face to
project is based on the plane which you have designed on and I can apply what I
have learnt and not repeat the same mistake for FYP. Another skill I have improved on is CAD. I learnt how to make use of parametric modeling. Thank you Dr Noel for recommending this. It allows me to conveniently make changes to the dimensions for the tea maker. This saves up a lot of time and lessen my frustrations as I do not need to keep redoing the CAD.
There were also many ups and downs throughout this
journey. Life is unpredictable and things do not always proceed as planned.
Some tasks took longer than expected such as Arduino Programming and 3D
printing. This was due to the problems that we faced mentioned in Section 4.
This resulted in us starting assembly at a later date as the different parts
are interdependent. As a result of the delay and upcoming EST, some of us felt
stressed out and were affected emotionally and mentally. This leads to my
second learning point. I have also improved my interpersonal skills working together
as a team. I learnt how to improve myself as a team member and communicate
better with others. As a team, we should rely on one another more and ask for help when needed. Running away
and trying to avoid the problem and shoulder it alone is never a good option. Your friends and lecturers are always there to
lend an ear and offer a helping hand. A strategy I have picked up on which I
can apply in FYP is to list the various tasks to complete with allocations and
deadlines. This helps to ensure accountability and responsibility. An important part is that the person should be able to choose which task they want to take.
This way the person will be willing to do and feel a sense of accomplishment and
satisfaction after completing the task.
I have also gained new knowledge on working on a project.
The first is systematic design. It helps us to approach a problem and develop
concept solutions. For example, after complete the function analysis, we can
think of possible solutions for each sub functions. From there, we made use of
the morphological chart to come up with different concepts. This is similar to
the SCAMPER that we did in ICPD. With the different concepts, I can apply what
I have learnt in previous modules and make use of the COWS matrix to choose the
best concept. The second is TRIZ. TRIZ was applied to our tea maker to make it
better for the users while ensuring it does not cause problems in other
aspects. The third is project management. Creating an activity logic table
followed by constructing a network diagram helps me to be clear of the various
tasks in the project. I know what is the next step after completing the
previous which reduces the time spent trying to figure what to do next. It
helps to begin with the end in mind. The Gantt Chart was also useful in keeping
track of the various tasks and checking if we are behind schedule and ensure
that the tasks will be completed in time.
A new skill learnt is
acrylic gluing. It is not as simple as gluing paper. The acrylic glue
(chloroform) works by melting the acrylics and when the two surfaces of the
acrylic are together, they will join. It needs to be tight such that there is
no gap between the surfaces. During the acrylic gluing process, we did not
succeed 100% of the time. Sometimes, the acrylic did not stick so we had to
apply chloroform again. We made use of masking tape to keep the two surfaces
attached to one another and left it for a while to dry before checking. I can
make use of this skill in FYP when I am creating a chemical device.