Laser Cutting
Laser Cutting Documentation Blog Entry
In this page, I will describe:
The 4 important hazards associated to the operation of laser cutting machine and their respective safety control measures (administrative/engineering control).
The materials that can be cut and can’t be cut using laser cutting machine.
The steps including pictures on the operation of UNIVERSAL laser cutter, that consist of:
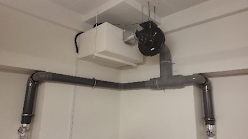
Starting the compressor, turning on the laser cutter machine and fume extractor.
Importing a .DXF file to coreldraw and modify the lines/fill for cutting and engraving.
Sending the coreldraw drawing to laser cutter software and setting the laser cutter power, speed, PPI in the software.
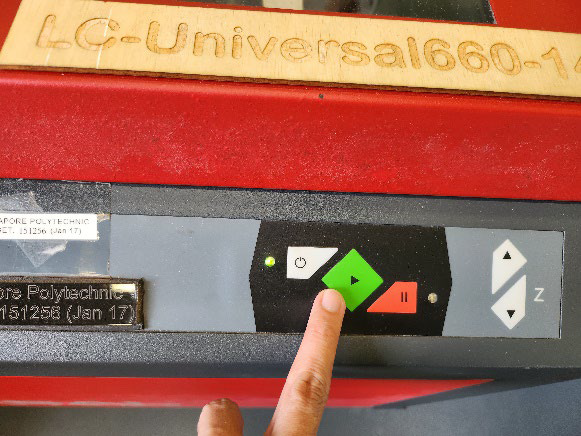
Starting the job on the laser cutter machine.
DOs and DONTs when there’s flame/fire on the material being cut.
My Learning reflection on the laser cutter activities.
These are the 4 important hazards and the respective safety control measures on the operation of laser cutting machine:

Below are the materials that can be cut/engraved using laser cutting machine in FabLab.


Below are the materials that can’t be cut/engraved using laser cutting machine in Fablab.


Below are the steps on the operation of UNIVERSAL laser cutter machine in FabLab:
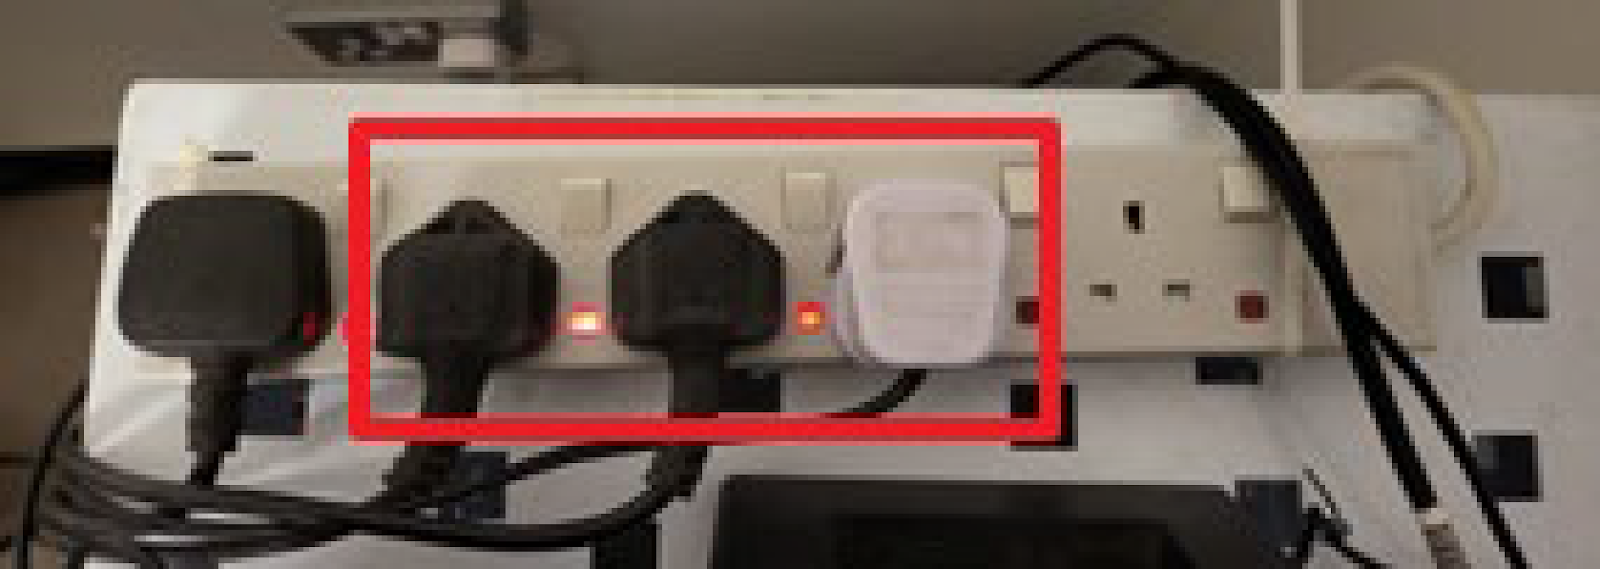
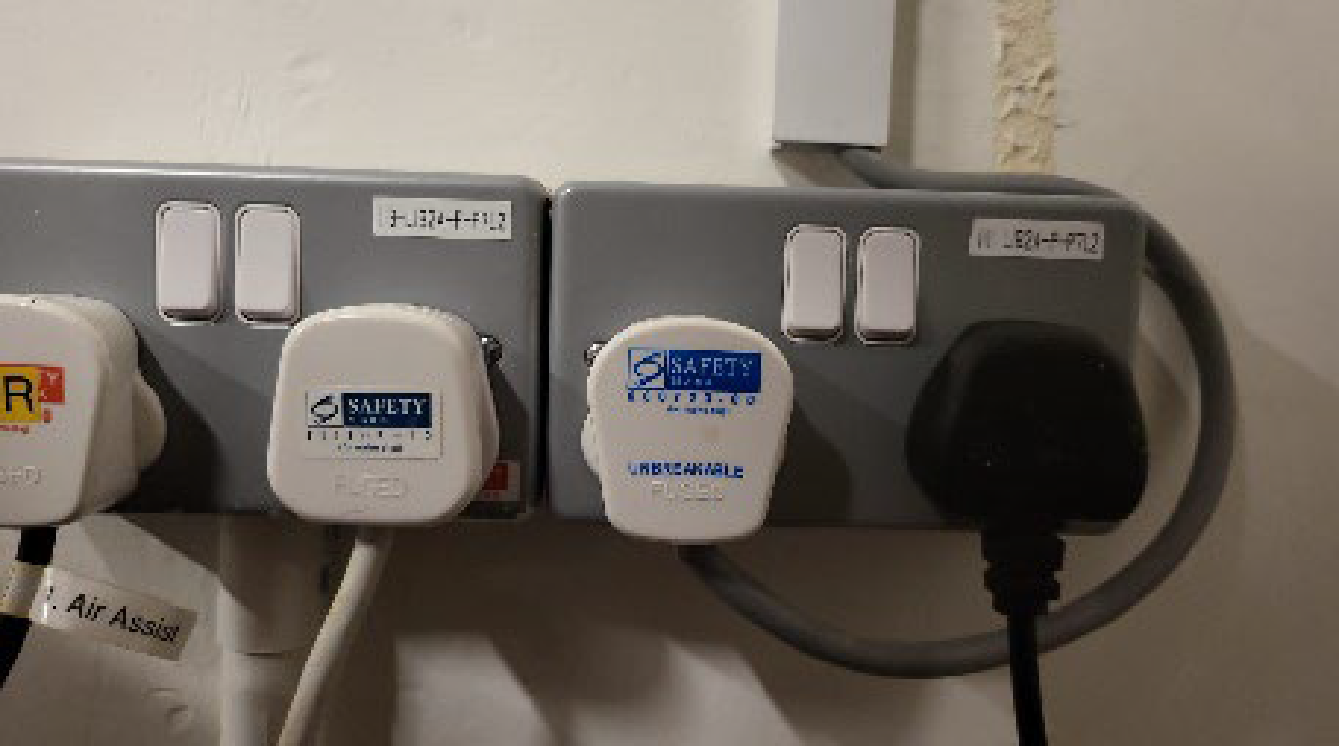
Starting the compressor, turning on the laser cutting machine and fume extractor.

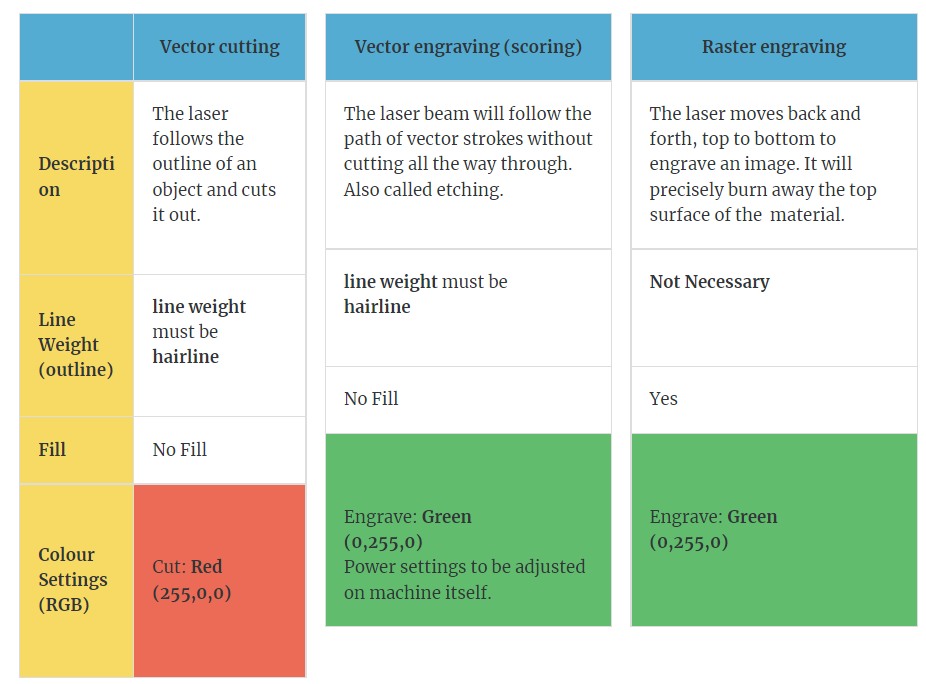
Importing a .DXF file to coreldraw and modify the lines/fill for cutting and engraving.


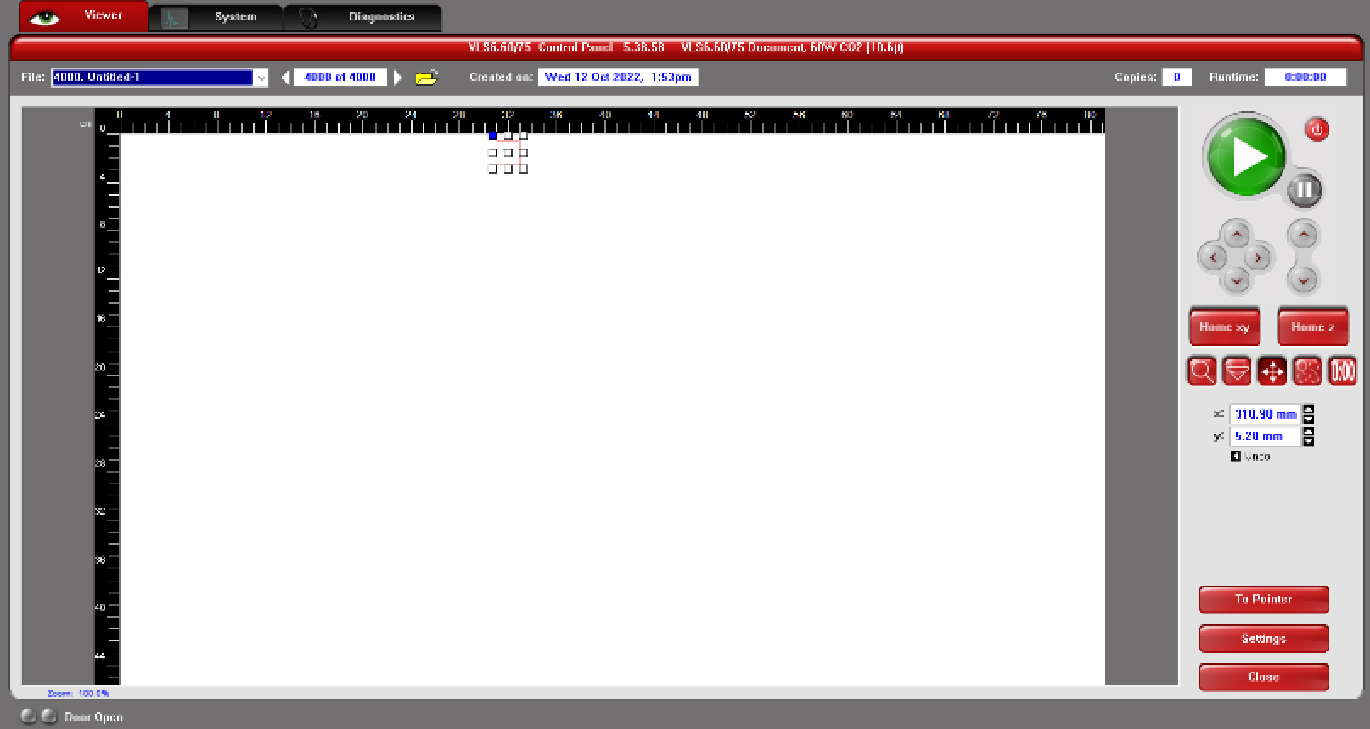
Sending the coreldraw drawing to laser cutter software and setting the laser cutter power, speed, PPI in the software.


Starting the job on the laser cutter machine.


DOs and DONTs when there’s flame/fire on the material being cut.


Below is my Learning Reflection on the laser cutter activities.
Through the practical, I learnt to operate the laser cutter and the various things to take note of. Laser cutting seems intimidating to me at the start. When I was told that there was a competency test on this, I was shocked😱 as we had never operated the laser cutter before. The competency test will be the first time we operate the laser cutter. Luckily with the SOP I created and Dr Noel’s advice, I was able to passed the test in time🥳. His advice was to highlight everything and make it green and hairline. After that, change the outline to cut to red. This makes it simpler and less time consuming as I do not have to individually change the different lines and objects to engrave. I can use this tip in the future.
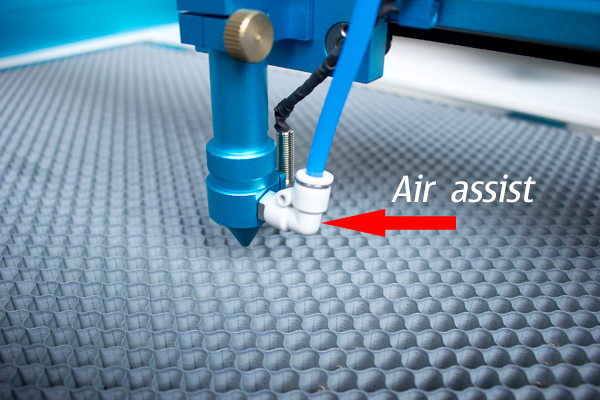
In ICPD, I encountered a problem when creating a slot and tab for the cardboard marble run machine. Some of the pieces could fit nicely while others were loose. Through trial and error, I learnt that I had to draw the slot to be smaller and not the exact length as the tabs so that it would not be loose. From the lesson, I also learnt that this problem is called Kerf and I will also encounter it when I’m using the laser cutter. This is something that I have to bear in mind when planning the dimensions📏 of the object for future projects.
The laser cutter was also much faster than using the 3D printer. It was able to cut out and engrave the key chain within one minute. If I were to use a 3D printer, it would have taken at least 10 minutes. Learning to use the laser cutter is a very useful skill that I acquired. It is able to cut out the shape neatly as compared to using a scroll saw machine that I learnt to use in secondary school. In order to make use of the laser cutter and the 3D print, I will still need the important skill of using Fusion360. Hence, I would need to brush up on my Fusion360 skills. Laser cutting is an essential skill to have in the future when I’m doing the CPDD project and in the capstone project. It takes a shorter time than using the 3D printer and time🕒 is very crucial as we may not have all the time in the world just to complete a certain task or create a certain part for the project.